How to Build a Portable Home Solar Lithium Battery Backup System
Release time: 2025-11-27
Table of Contents
In today’s world, where energy independence and sustainability are increasingly prioritized, building a portable home solar lithium battery backup system is becoming a highly sought-after project. Whether you live off-grid, want to reduce your utility bills, or need a backup during power outages, a solar-powered backup system offers a reliable solution. In this guide, we’ll walk you through how to build your very own portable solar lithium battery backup system that can serve as a reliable source of power for your home or outdoor activities.

Why Choose Solar Lithium Battery Backup Systems?
Before diving into the “how-to,” it’s essential to understand why you would choose a solar lithium battery backup system over traditional energy solutions. Here are the main advantages:
- Environmentally Friendly: Solar power is renewable, reducing your reliance on fossil fuels and lowering your carbon footprint.
- Cost-Efficient: After the initial investment, solar power systems help you save on electricity bills by utilizing free energy from the sun.
- Reliable Power Supply: During blackouts or emergencies, a solar-powered system with lithium batteries can provide uninterrupted power.
- Portability: Unlike fixed solar systems, a portable solar battery system can be moved around for different purposes, such as camping, RVs, or remote work sites.
Components You’ll Need for the System
To build a portable home solar lithium battery backup system, you’ll need a few essential components. Each part plays a vital role in ensuring the efficiency and portability of the system:
a. Solar Panels
Solar panels are the heart of your solar power system. They capture sunlight and convert it into electricity. The number of panels you need depends on the size of your battery bank and the amount of power you want to generate. Key factors to consider:
- Efficiency: Choose high-efficiency panels to maximize energy production.
- Size and Wattage: Panels are rated by wattage (e.g., 100W, 200W, etc.). For portability, consider using panels in the 100-200W range.
- Durability: Look for weather-resistant panels designed for outdoor use, especially if you plan to use the system in various conditions.
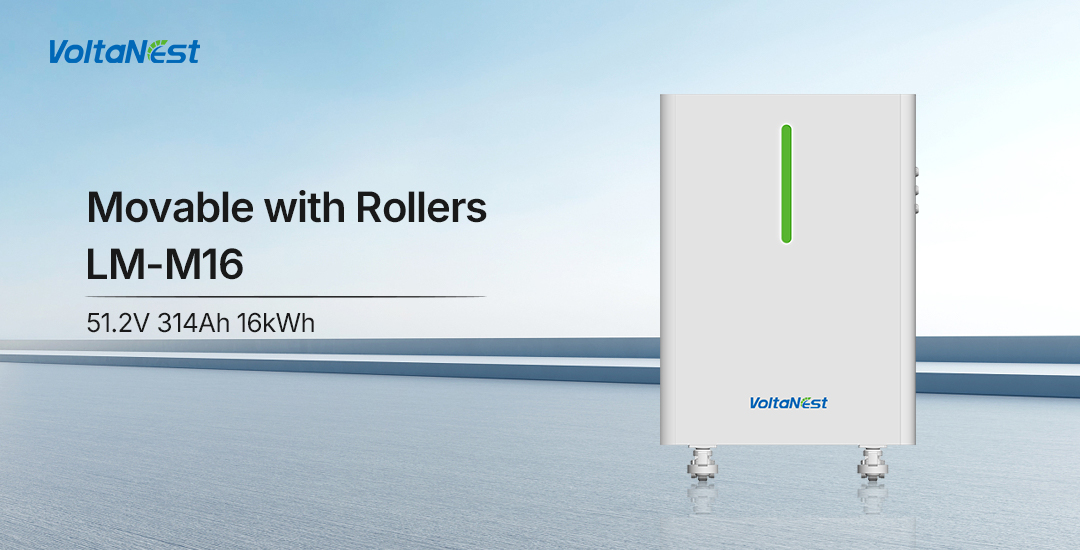
b. Lithium Battery Bank
Lithium-ion batteries are the best choice for storing solar energy due to their high efficiency, long lifespan, and lightweight nature. They can store the energy generated by the solar panels to be used later.
- Capacity: The battery’s capacity is measured in amp-hours (Ah) or kilowatt-hours (kWh). Choose a battery size that meets your power needs.
- Voltage: Make sure the battery voltage matches the output voltage of the solar panels and inverter.
- Battery Management System (BMS): A BMS ensures the safe operation of your lithium battery, preventing overcharging, overheating, and discharging.
c. Solar Charge Controller
The solar charge controller regulates the voltage and current from the solar panels to safely charge the battery. There are two main types of controllers:
- PWM (Pulse Width Modulation): More affordable but less efficient.
- MPPT (Maximum Power Point Tracking): More expensive but offers higher efficiency, especially in cloudy conditions.
d. Inverter
The inverter converts the DC (direct current) electricity stored in the lithium battery into AC (alternating current) electricity, which is used by most household appliances.
- Power Rating: Choose an inverter with a power rating high enough to handle the peak load of the appliances you plan to run.
- Pure Sine Wave: A pure sine wave inverter is ideal for running sensitive devices like computers and medical equipment, as it provides a smooth and consistent output.
e. Cables and Connectors
You will need high-quality cables and connectors to link all components together. It’s essential to use the right gauge of wire to prevent overheating and ensure efficiency.
f. Portable Power Station or Enclosure
For portability, consider installing all the components inside a portable power station or custom enclosure. This helps protect the equipment from the elements and makes the system easy to transport.
Step-by-Step Guide to Building the System
Now that you understand the components, let’s go through the step-by-step process to build your portable home solar lithium battery backup system.
Step 1: Planning Your System
Begin by assessing your power needs. Determine the devices you want to power and their energy consumption. This will help you choose the appropriate size of the solar panel array and battery storage.
- Calculate Daily Power Usage: Add up the wattage of the devices you intend to power and estimate how long you’ll be using them each day.
- Choose Battery Size: Based on your daily power usage, calculate the capacity of the battery. For example, if you need 1000W of power daily, a 100Ah 12V lithium battery will be a good starting point.
Step 2: Install Solar Panels
Install the solar panels in a location where they will receive maximum sunlight. You can mount them on your roof, in your yard, or on a portable stand for flexibility. Ensure the panels are angled correctly for optimal energy absorption.
- Connect Panels in Series or Parallel: Depending on your battery voltage, connect the panels in series (higher voltage) or parallel (higher current) to achieve the desired power output.
Step 3: Connect the Charge Controller
The charge controller acts as the intermediary between the solar panels and the battery bank. Connect the solar panels to the input side of the charge controller, and then connect the output side to the lithium battery.
- Monitor Voltage and Current: Ensure that the voltage and current match the specifications of your battery and controller.
Step 4: Wire the Lithium Battery
Connect your lithium battery to the system. Ensure that the positive and negative terminals are properly connected to avoid short circuits. If your battery has a Battery Management System (BMS), it should automatically handle overcharging and discharging issues.
Step 5: Install the Inverter
Connect the inverter to the battery, ensuring it is wired correctly for DC-to-AC conversion. The inverter should be wired to the output terminal of the battery system, and the AC output can then power your devices.
Step 6: Safety and Monitoring
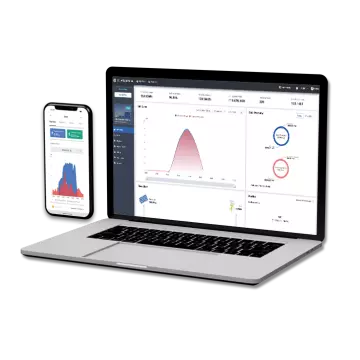
Once all components are connected, ensure that all connections are tight and secure. You may want to install a fuse or circuit breaker for safety. Additionally, consider installing a monitoring system to keep track of battery status, solar panel performance, and energy usage.
Maintenance and Optimization Tips
Once your portable solar lithium battery backup system is up and running, here are a few tips for maintaining its efficiency:
- Regular Cleaning: Clean the solar panels regularly to remove dirt and debris that may obstruct sunlight absorption.
- Battery Maintenance: Lithium batteries require minimal maintenance, but it’s still a good idea to monitor their charge levels and replace them when necessary.
- Monitor Performance: Use a solar monitoring app or device to track energy production and consumption, ensuring optimal performance.
Conclusion
Building a portable home solar lithium battery backup system is a rewarding project that can provide reliable and sustainable energy for your home or outdoor activities. With careful planning, quality components, and proper installation, you can enjoy the benefits of energy independence and power backup during emergencies. By following this step-by-step guide, you’ll be well on your way to creating a fully functional solar backup system that meets your needs and contributes to a greener future.